Blog

  • I Swapped to an RV King Mattress — Here’s What Actually Happened

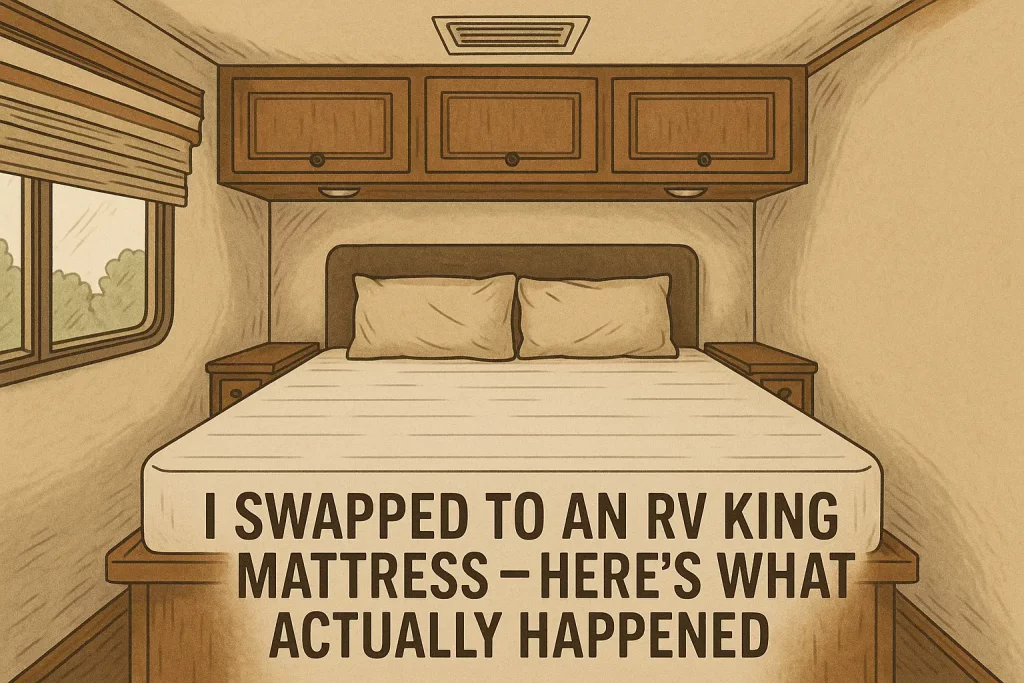
    I’m Kayla, and I sleep picky. I’m also a road girl. We camp at least two weekends a month when the weather plays nice. The stock mattress in our fifth wheel felt like a cracker. So I changed it out for an RV king. You know what? I finally slept.

    If you’d like the detailed, step-by-step story of the swap itself, you can read my full write-up right here.

    The quick version

    • Better sleep than the factory pad. Way better.
    • Cool enough most nights, warm in heavy heat.
    • Great for motion control. Edge support is just okay.
    • Fit matters. Measure twice. Then measure again.

    What I bought and why

    Our rig is a 34-foot fifth wheel with a slide bedroom. The bed space is 72 by 80 inches, which is RV king size. I went with the DreamFoam Essential by Brooklyn Bedding, 10-inch, medium-firm, RV king (72×80). I paid about $499 on sale.
    The deep-dive DreamFoam Essential mattress review from Sleepopolis gave me the confidence I wasn’t tossing money at foam hype.

    Why that one? Foam for pressure relief. Not too tall, so it clears the cabinets. Boxed, so we could snake it through the door without cussing all day. Well, we still cussed a little. Buying a mattress online can feel a bit like online dating—you scroll through perfect pictures and hope you’re not about to get played by clever marketing; if you’ve ever worried about being duped, check out this breakdown of what it really means to get catfished to learn the red flags and keep your next big purchase from becoming a costly disappointment.

    I’m 5'6" and about 150. I sleep on my side. My husband is 6'2", around 210, and rolls like a log. We also have a 55-pound dog who thinks she pays the campground bill.

    Setup: less pain than the old springs

    The mattress came rolled. Two of us carried it in. Maybe 70 pounds, give or take. It fit through the RV door fine once we turned it on the narrow side. I cut the plastic, and it puffed up fast. It needed about 24 hours to fully expand.

    There was a light “new foam” smell. It aired out after a day with the windows open and the fan on low. We slid a Dry-Mat style mesh under it to help with moisture. RV bedrooms get damp on cool nights. That mesh helps a ton.

    One more thing: our bed has lift struts for storage. With the new mattress, it still lifts, but it needs a bit more oomph. Manageable.

    Real nights on the road

    First trip with the new bed: a chilly weekend near Flagstaff in April. Nights hit 37°F. With a cotton sheet and a light quilt, I stayed warm without sweating. The foam hugged my shoulders and hips. No dead arm at 2 a.m., which used to be a thing.

    Second test: two sticky nights outside Austin in August. We ran the AC at 72. I did feel a touch warm by 5 a.m., but not swampy. I added a breathable mattress protector the next night. That helped.
    Interestingly, Tom’s Guide also points out the DreamFoam Essential can run a little warm, so my experience lined right up with their lab notes.

    We also camped on the Oregon coast. Fog rolled in. The room felt damp, but the mattress stayed dry on top. The mesh under it kept the base from getting clammy. I checked. No surprise puddles.

    If you want a scenic, riverside spot where you can give a new RV mattress its first real workout, consider booking a few nights at Riverhouse Acres — the shaded sites and cool mountain air pair perfectly with foam comfort.

    And if your rolling home ever takes you through Sandusky, Ohio, and you’d like to turn a regular camp stop into a playful date night, check out the Sandusky sex guide for a curated rundown of the city’s top adult-friendly lounges, clubs, and late-night attractions so you can skip the guesswork and head straight for the fun.

    Comfort, in plain talk

    • Pressure relief: Yes. My shoulders felt good. Hips too.
    • Motion transfer: Strong. My husband climbed out, I barely felt it. The dog did her 3 a.m. circle, and I didn’t wake.
    • Edge support: Meh. It’s fine for sleep. But when I sat to tie my shoes, the edge squished down. Not a deal breaker, just a note.
    • Noise: Quiet. No creaks. No springs. Just breathing and snores.

    Fit and space stuff that actually matters

    Our slide gives us 1 inch of clearance with the 10-inch height. A 12-inch would’ve bumped the wardrobe trim. So watch that. Measure length, width, and height. Twice.

    Our RV king is 72×80, not 76×80 like a home king. Standard king sheets hang weird. RV king sheets fit better. Deep-pocket queen sheets worked in a pinch, but they needed a strong tuck and a little prayer.

    Making the bed is still a workout. It’s an RV. Corners are tight. I learned to hook the foot corners first, then yank the head corners while standing on the step. Not graceful. It works.

    How it’s holding up

    We’ve slept about 30 nights over 6 months. No sagging. No lumps. I rotate it head-to-foot every few trips. The cover still looks clean. I do use a protector because spills happen. Coffee in bed is a lifestyle.

    Little things I liked

    • It came in a box. Easy in, easy out.
    • Medium-firm felt truly medium for me. Soft on top, solid under.
    • Good for side sleep. My back didn’t complain when I shifted to my stomach for a bit.

    The stuff that bugged me

    • Edge support could be stronger. If you sit on the side a lot, you’ll notice.
    • Warmth in heavy heat. On tough August nights, you’ll want a fan or lighter sheets.
    • Off-gassing for a day. Not awful, but still there.
    • Sheet game. You may need RV king sheets. Some regular sets didn’t fit right.

    A few tips I wish someone told me

    • Check slide clearance with a tape. Don’t guess.
    • Look under the bed for struts. A much heavier mattress might make lifting harder.
    • Air the bedroom before the first night. That new foam smell leaves faster.
    • Put a breathable mat or slats under the mattress. Stops moisture buildup.
    • Bring a non-slip rug pad if your platform is slick. Ours stayed put, but I like insurance.

    Who this suits

    • Side sleepers who want pressure relief without sinking.
    • Couples who hate motion shake.
    • Folks who need RV king size and keep their slide happy.

    Who might pass? If you sit on the edge a lot, or you run hot and camp without AC in summer, you may want a firmer spring or a hybrid with stronger edges.

    Final thoughts

    This RV king mattress made our trips feel more like home. Not fancy. Just solid sleep, with fewer aches, and fewer “Ugh, why is my arm numb?” moments. If your factory pad feels like a cereal box, a 10-inch RV king foam can be a sweet upgrade.

    Would I buy it again? Yep. I already told my brother to get the same one for his toy hauler. He snores less on it, which his wife says counts as a miracle. I’ll take the win.

  • My Real-Life Take on an RV Bunk Mattress

    I’m Kayla, and I travel with two kids, a patient husband, and a lot of snacks. We camp in a 2016 Forest River Sunseeker. While planning one of our loop trips, we spent a long weekend at Riverhouse Acres, a quiet riverside campground that turned out to be the perfect place to put these new bunk mattresses through their paces. It has skinny bunks—28 by 72 inches. The stock pads were… fine for a kid nap. Not for a full night. My nine-year-old called hers “the tortilla.” That stung a bit. For the full behind-the-scenes story of how I tackled every cut and corner, you can read my real-life take on an RV bunk mattress.

    So I tested two real bunk mattresses over a few trips: a Zinus 6" Green Tea Memory Foam (narrow twin), and a Lucid 5" Gel Memory Foam. I cut both to fit the weird size. Yes, I actually cut them. With a bread knife. It worked way better than I expected.

    Fit Comes First (And Corners Matter)

    • Bunk size: 28" x 72" (mine)
    • Zinus came as 30" x 75"
    • Lucid came as 30" x 75"

    I made a cardboard template for the rounded corners. I traced it on the foam, then trimmed. I used painter’s tape along the cut line so the foam wouldn’t flake. You know what? It gave me a clean edge. I slid the mattress in on its side to clear the door and the cabinet. That part felt like Tetris, but we got it.

    The 6" Zinus sat a bit high, so the safety rail felt shorter. The 5" Lucid left a little more rail above the mattress. My youngest sleeps wild, so I notice stuff like that.

    First Nights: Kid Report, Then Mom Report

    Night one with the Zinus: my oldest slept the whole night and did not grumble. That is huge. She said her hip didn’t dig in anymore. I tried it too, for half the night, and I felt fine on my shoulder. I’m 150 pounds and a side sleeper. No numb arm. That was a win.

    Night one with the Lucid: cooler feel right away. My hot sleeper (the little one) stuck with this one. She didn’t toss the blanket off like she usually does.

    If I had to sum it up: Zinus felt softer, like a hug. Lucid felt a bit firmer and cooler.

    Smell, Heat, and All That Real Stuff

    Both had that “new foam” smell. Not wild, but it was there. I opened the window, turned on our MaxxAir fan, and left them out for a day. By the second night, I barely noticed it.

    Heat: the Zinus ran warmer. In Arizona last spring, my back felt toasty. The Lucid stayed cooler in the same spot. On chilly nights in Colorado, the Zinus was cozy. So it depends on the weather and the kid.

    Motion: the foam didn’t squeak. No springs means no “boing” when someone climbs up the ladder at 2 a.m. I liked that.

    The Moisture Thing Folks Don’t Tell You

    Bunks don’t breathe much. We got a damp patch under the mattress after a rainy weekend in Oregon. Lesson learned. I added a HyperVent Aire-Flow mat under the bunk. Also tried cheap rug gripper under the mattress. Both helped. Since then, no musty smells. I also crack a window when we cook inside. Steam adds up.

    On the Road: Will It Slide?

    Yes, it can. The Zinus slid half an inch after a long, bumpy road to a state park. I fixed it with two strips of heavy hook-and-loop at the head, stuck to the plywood. Now it stays put. The Lucid stayed a bit better, maybe because it was lighter.

    Covers, Spills, and That One Hot Chocolate

    I used a SafeRest waterproof encasement and a soft jersey sheet. It made cleanup easy. There was one “hot cocoa surprise” at midnight. The cover saved me from a meltdown. Well, two meltdowns, if we count mine.

    Comfort vs Space: 5" or 6"?

    Here’s the thing. Both are good, but they do different jobs.

    • 6" Zinus: best for comfort if you’re an adult or a heavier teen. Softer top. Warmer feel. But watch the guard rail height.
    • 5" Lucid: best for kids who sleep warm, or if you need more rail above the mattress. Feels a little firmer. Good support for little spines and flippy sleepers.

    Small Gripes I Noticed

    • Zinus: warmer, and the edges felt softer when I sat to tie a shoe.
    • Lucid: corners were a hair slow to puff up after cutting. They did settle fine by day two.

    Quick Pros and Cons

    • Zinus 6"

      • Pros: plush feel; great pressure relief; quiet
      • Cons: runs warm; lowers guard rail; slides a bit unless you secure it
    • Lucid 5"

      • Pros: cooler; keeps more guard rail; easier to lift and move
      • Cons: a touch firmer; not as cushy for adults on side

    One More Little Fix That Helped

    I added a thin 1/2" wool felt pad between the mattress and the cover for the Zinus. It wicked sweat and kept the heat down. Old camper trick from a neighbor in Flagstaff. He was right.

    Final Call: What I Kept

    We kept the 5" Lucid on the top bunk for my hot sleeper and the 6" Zinus on the bottom for my older kid and me on movie nights. That mix worked. If I had only one bunk and a teen or adult uses it, I’d go Zinus 6". For little kids or summer trips, Lucid 5" is the easy pick.

    For a wider roundup of highly rated picks that ship fast, check out this best mattress on Amazon guide.

    Would I buy either again? Yes. I’d still cut to size, still add the airflow mat, and still use a waterproof cover. And I’d still stash a bread knife in the RV bin. Sounds odd, but it saves the day. If your mattress plans eventually stretch beyond bunks to the main bed, take a peek at what really happened when we swapped to an RV king mattress—that upgrade had its own surprises.

    When the kids are finally zonked out on their comfy new bunks, the grown-ups sometimes get a few rare minutes of quiet camp-side downtime. If you want to keep things playful without waking little ears, the quick-message app Kik can be a discreet lifesaver. The Kik Sex Handbook lays out step-by-step advice for setting up private chats, sharing spicy photos safely, and keeping the spark alive even when RV walls feel paper-thin.

    And if your campground itinerary ever steers you up through Washington State, having a no-nonsense local playbook can save you from endless Googling—this Bellingham sex guide pulls together the city’s most welcoming lounges, clubs, and meet-up ideas so you can spend less time planning and more time enjoying that hard-earned date night.

  • My RV Fridge Story: Cold Milk, Warm Nights, And A Few Oops Moments

    Note: This is a fictional, first-person narrative review written for creative purposes.

    Meet my fridge (well, fridges)

    I’ve lived with two kinds of RV fridges. The first was a 2-way propane unit in a small travel trailer. Later, I had a 12V compressor fridge in a bigger rig. Both did the job. Both also made me say, “Really?” more than once.
    If you’re curious about every hilarious detail, check out my bigger RV fridge story with all the oops moments that inspired this quick overview.

    Quick setup stuff that matters

    Level is not a cute suggestion for a propane fridge. I learned fast. If I was off, even a little, it ran hot and cooled weak. I kept a tiny bubble level stuck by the door. Silly, but it saved my bacon. Literally.

    The 12V fridge was easier. No fuss with level. It just ran off the battery. I did add a travel latch, though. One dumpy road in Utah popped the door open, and I chased grapes under the dinette. Not my favorite memory.

    So…does it keep food cold?

    Short answer: Yes. Mostly.

    • In Arizona heat (upper 90s), the 12V fridge kept milk cold and safe. It cooled fast, like in a few hours, not a whole day.
    • The propane fridge cooled slower. I had to pre-chill it the night before and load cold food. If I put in warm drinks, it sulked.

    If you'd like a deeper dive into the cooling performance differences between gas and electric models, this guide lays out the science without the jargon.

    One silly note. I froze my lettuce more than once. The back wall on both fridges runs cold. I started using a little wire shelf to pull greens forward. Problem solved. Lesson learned.

    Power use and camp vibes

    Boondocking is where the 12V fridge showed its mood. If you're looking for a peaceful spot to dial in your power game beside a flowing river, check out Riverhouse Acres—the hookups and valley shade make a perfect real-world test bed. On mild days, it felt light on the battery. On hot days, I watched my monitor like a hawk. Those same amps also kept my phone topped up for late-night Google chats with my partner; if you’re curious about turning a routine Hangouts window into a digital campfire for two, this Google Hangouts sexting guide explains the settings, safety steps, and playful prompts so you can keep the romance warm even when the mountain air isn’t.
    On a different kind of layover, when my route swung me through Florida’s Gulf Coast, I wanted to trade digital flirtiness for real-world chemistry; that search led me to this Clearwater-focused adult nightlife guide which maps out discreet venues, etiquette tips, and up-to-date reviews so travelers can decide if a sunset along the pier should roll into something steamier after dark.
    A simple plan helped:

    • I ran 200W of solar and two house batteries.
    • I kept the fridge around mid setting.
    • I didn’t stand there with the door open, like a lost raccoon.

    For another perspective on how propane stacks up against electric in real-world RVing, I found this comparison super helpful when I was first shopping.

    With the propane fridge, I saved battery but used propane, of course. One windy night, the flame blew out. I woke up to warm yogurt. After that, I put in a little vent fan and a wind baffle. Not fancy, but it kept the flame steady.

    Noise, space, and tiny quirks

    The 12V compressor made a low hum at night. Not loud. Just…there. I got used to it, like background rain. Getting used to subtle nighttime sounds felt similar to my recent quest to find a better RV bunk mattress—comfort is a game of inches in a tiny home.

    Shelf space felt better on the 12V unit. Tall bottles fit the door bin. Eggs had a safe spot. The crisper drawer worked, but sometimes trapped moisture. I started laying a paper towel under the greens. It kept slimy spinach away, which is a win in any book.

    Real life oops and fixes

    • Frost on the fins after a week in humid Florida. I turned the fridge off, put towels under the fins, and pointed a tiny fan inside for 20 minutes. Boom—done. I don’t like scraping ice. Too messy.
    • Hot wall vent on a long climb in Colorado. I added a cheap computer fan behind the vent to pull heat out. That knocked temps down by a few degrees inside.
    • Loose seal once. I learned the dollar bill test: close the door on a bill and tug. If it slides easy, the seal’s weak. I warmed the gasket with a hair dryer and pressed it back in place. Pretty neat trick.

    Travel day habits that stuck

    • I press on all lids. The salsa test is real.
    • I use spring bars across shelves so jars don’t fly forward.
    • I put drinks low and heavy. Food bruises less if it sits tight.
    • I precool the fridge at home and load food cold. It starts strong and stays that way.

    Cleaning without drama

    Baking soda in a little bowl. Wipe spills right away. Once a month, I wash seals with warm, soapy water. And I leave the door cracked open when I park it in storage. A wooden spoon works as a prop. Keeps smells away.

    What I loved

    • 12V fridge: quick to cool, steady temps, no level stress.
    • Propane fridge: sips battery, great for long stays away from hookups.
    • Both: easy to live with once you learn their moods.

    What bugged me

    • Propane fridge: must be level; slow to cool; wind can blow out the flame.
    • 12V fridge: hum at night; higher draw in heat; needs decent solar or shore power to feel chill.

    Little tips that saved my dinner

    • Use a cheap fridge thermometer. Don’t guess.
    • Keep a small fan in the back vent for hot days.
    • Don’t pack it tight—air needs to move.
    • Push greens forward; cold wall = frozen salad.
    • Travel latch. Trust me on this one.

    Who should choose what?

    • Weekend campers with hookups: 12V is simple and fast.
    • Long boondock folks with big solar: 12V works, just plan your power.
    • Off-grid, low-power setups: propane is your friend, as long as you mind the level and airflow.

    My simple verdict

    I’d pick the 12V fridge again for daily life. It cools fast and feels steady. But I miss the propane fridge on long, quiet boondocks where power is tight. Funny, right? Different trips, different needs. That’s RV life. One day it’s salsa on the floor. The next day it’s cold milk at sunrise. And somehow, both moments stick with you. And because restful sleep goes hand in hand with a happy fridge routine, I finally swapped to an RV king mattress so the humming compressor never stands a chance of keeping me awake.

  • My RV Recliners: What Worked, What Didn’t (Real Trips, Real Seats)

    I’m Kayla, and I live small but sit well. I’ve had three different RV recliners in two rigs. I learned a lot the hard way. Some good. Some not so good. You know what? A chair can make or break a rainy day in a campground. If you want the quick version of every win and fail, you can hop over to my full breakdown of RV recliners I’ve tested for all the gritty details.
    For anyone mapping out a riverside stop, River House Acres in North Carolina is a laid-back campground where a good recliner and a better view go hand in hand.

    Here’s the deal. I’ll tell you what I used, how it felt, and what broke. I’ll also share little moments. Like the time my dog, Penny, launched into my lap mid-nap during a storm in New Mexico. That poor cup holder never saw it coming.

    The setup: my rig and how we sit

    • First rig: 2019 Grand Design Reflection 295RL (fifth wheel)
    • Current rig: 2022 Winnebago Minnie 2801BH (travel trailer)
    • Crew: me, my husband, and Penny the shed monster
    • Style: weekend trips, a few month-long loops, some boondock weeks

    We read, we stream games, we eat tacos with our feet up. So the recliners get used. A lot.

    When the weather traps us inside and the recliner becomes command central for browsing, chatting, and, yes, a little harmless flirting, a candid review of UberHorny can clue you in on how the hookup platform works, what membership costs, and the safety tips that keep road-warrior singles (or curious couples) in control while looking for company between campgrounds.

    Recliner #1: Thomas Payne Theater Seating (powered, 60” wide)

    This came stock with the Grand Design. Ours was the Thomas Payne theater seat with heat, massage, and blue lights. It ran on 110V. Two USB ports in the console. Cup holders with a tiny LED ring. Kinda fancy, right?

    What I loved at first

    • The “wall-hugger” slide was smooth. We needed just about 3 inches off the wall.
    • The foam felt plush. Not squishy, not hard. Right in the middle.
    • The blue LED rings were nice at night. Soft glow. No glare.
    • Power recline was quiet. One button. Feet up. Done.

    Real moment: Week one, we parked near Sedona. I watched a storm roll in. Put the seat on “heat” and sipped bad campground coffee. It felt like a tiny spa with tires.

    What bugged me later

    • The “massage” was more buzz than massage. Like a phone on vibrate.
    • The heat pad focused on my lower back. It missed my legs.
    • The USB ports charged slow. Fine for a phone. Not great for a tablet.
    • The bonded leather (PolyHyde) started to peel after year two. Arizona sun did not help. By month 30, the arm tops looked like a lizard shed.
    • The footrest had a crumb gap. Chips fell in. I found a lost peanut M&M in there. Not proud.

    Little fail: The right motor got noisy at 6 a.m. one morning—like a low hum with a grind. It still worked, but it sounded tired.

    Fit and fuss

    • Weight: about 160–170 lbs for the pair.
    • Entry: came in two pieces; backs slid onto rails and locked.
    • Power: needed shore power or our inverter to run. No power = no feet up.

    Conclusion on Thomas Payne: comfy early on, but vinyl peel and a weak “massage” killed the joy by year three. If you camp cool and gentle, you might be fine. If you chase sun like we do, plan a cover or a swap.

    If you're still weighing the pros and cons, a comprehensive review of Thomas Payne Theater Seating compiles additional user experiences and full product specifications.

    The swap: RecPro Charles 67” (manual, cloth, “Oatmeal”)

    We pulled the Thomas Payne and put in a RecPro Charles dual recliner, manual pull tabs, cloth fabric. I wanted less peel risk and a seat that worked off-grid.

    Install day details

    • We used a T25 bit and a socket to free the old bolts from the floor.
    • The RecPro came in three boxes. Backs clicked on. Easy.
    • It fit through our door without me swearing (rare win).
    • Slide clearance was fine. It still needed a couple inches behind it.

    What felt good right away

    • Manual pull means no power needed. Hello boondocking naps.
    • The cloth breathed better than vinyl. No sticky back in summer.
    • The foam was firm the first week, then it settled in. After a month, it felt right.
    • The center console had deep storage. I hid the remotes, a deck of cards, and… a tiny sewing kit. I’m that person.

    Real moment: Rain day in Colorado. We watched a double-header on a hotspot. I pulled the tab, and the seat clicked out fast. No whir. Penny jumped up, spun twice, and passed out. I used her as a blanket.

    And the bad stuff

    • Pet hair. The cloth grabs it. A lint roller lives in the console now.
    • The pull tab was stiff the first week. It loosened up.
    • Cup holders are a bit small. My big Yeti tumbler wobbled.
    • The console lid needed a quick tighten to stop a wiggle.

    Power note

    Our unit was manual, so no cord. But I tried a friend’s RecPro power version in their Jayco. The motors were fine, but they also needed 110V. Same inverter deal as the Thomas Payne if you’re off-grid.

    Conclusion on RecPro: not fancy, but steady. Cloth ages better, even if it loves lint. For dry camping or sunny states, it just makes sense.

    For more real-world data, this in-depth analysis of the RecPro Charles RV recliner gathers long-term customer feedback and durability tests.

    A quick detour: two La-Z-Boy wall-huggers in the Minnie

    In our Winnebago, we ditched the factory jackknife sofa and put in two La-Z-Boy “Casey” wall-hugger chairs (manual). We bolted them to the subfloor so they wouldn’t walk while towing. They aren’t “RV chairs,” but they fit and feel like home. The Minnie’s bunks came with thin pads that felt like plywood, so I eventually tackled that too—my full thoughts are in my real-life take on an RV bunk mattress.

    Pros: dreamy foam, easy pull, classic look. Cons: no console, no cup holders, and we had to add small straps to keep the backs from lifting while towing. Still, movie nights got better fast.

    How the chairs handled real life

    • Heat: Arizona summer roasted the Thomas Payne vinyl. The RecPro cloth won that round.
    • Cold: The Thomas Payne heat pad was cozy but focused. A throw blanket did more.
    • Spills: Coffee wiped off vinyl easy. Cloth needed a dab of cleaner and a blot. Faint ring if I was slow.
    • Pets: Vinyl didn’t grab hair, but claws could scuff. Cloth hugged hair but hid tiny scuffs.
    • Off-grid: Manual wins. Power seats need an inverter or shore power. Simple as that.

    What I wish I knew sooner

    • Measure everything. Door width, slide clearance, and the space when the seat is fully out.
    • Check weight. A heavy double seat can change slide balance. Not by much, but still.
    • Look under the chair. If you see a big crumb trap, line it with a thin mat.
    • Fabric matters. Sun kills bonded leather fast. Cloth looks plain, but it lasts.
    • USB ports on seats are weak. Use a wall charger or a hub for tablets.
    • Bolt points: find floor joists and use big washers. Don’t guess over a tank.

    Speaking of measuring, one of our favorite long loops winds up through Oregon’s coastal campgrounds. If your recliner day turns into a curiosity about the local after-dark scene, the USA Sex Guide for Oregon lays out the state’s best clubs, bars, and etiquette tips—handy intel so you can skip the guesswork and dive straight into the fun once the stabilizers are down.

    • Same goes for bedtime upgrades: precise measuring saved the day when we swapped to an RV king—catch the whole story here.

    Quick picks by use case

    • Sun chaser or full-timer: RecPro cloth or another true fabric. No peel, less sweat.
    • Weekend glam and hookups: Thomas Payne power can feel fancy. Just baby the vinyl.
    • Off-grid often: Manual pull tabs. Your future self will thank you.
    • Big cups, big gulps: Check the
  • “I Took My Flagstaff RV Across Arizona — Here’s What Went Right (and What Bugged Me)”

    You know what? I didn’t plan to fall for a trailer. But my Flagstaff did win me over… mostly. If you want the blow-by-blow from the road, you can read the full trip report over on Riverhouse Acres. I’ll tell you where it shines, and where it made me mutter under my breath at a gas station in Camp Verde.

    Still researching whether this rig is right for you? Check out real-world owner experiences on RV Insider before you make the leap.

    I’ve spent the last year with a 2022 Flagstaff Micro Lite 25FKBS travel trailer. If you want the exact factory numbers—length, tank capacities, GVWR—you can scan the official spec sheet on J.D. Power.

    Towed it with my 2019 F-150 3.5 EcoBoost and an Equal-i-zer weight-distribution hitch. I camped in Flagstaff (of course), Sedona, and down near Lake Havasu. Me, my husband, our kid, and a sandy, happy dog named Beans.

    The Rig, Plain and Simple

    • Floor plan: front kitchen, bedroom slide, mid bath
    • Dry weight on paper: a hair under 6,000 lbs
    • Fresh/gray/black tanks: enough for a long weekend if you keep showers short
    • Outside griddle and power awning (with LEDs that my kid insists on turning purple)
    • Torsion axle and aluminum frame, so it rides smoother than our old stick-and-tin trailer

    Nothing fancy, but not cheap-feeling either. The cabinets don’t wobble like a folding card table. Still, a few parts did need a little love. I’ll get there.

    Hookup and Haul: White Knuckles or Easy Day?

    First trip was Phoenix up I-17 to Flagstaff. That grade is no joke. The truck handled it, and the trailer tracked straight. Crosswinds near the Sunset Point rest area made me grip the wheel, but sway stayed calm with the hitch set right.

    • Climb temps: fine, even pulling in 90-degree heat
    • Braking: good control with the factory brake controller
    • MPG: let’s be real—about 9.5. Headwinds? 8. And I said a few choice words.

    Setup at Fort Tuthill County Park took ten minutes. I use Andersen levelers, a cheap bubble level, and those bright orange chocks that look like Lego. The electric tongue jack felt like cheating after years of cranking by hand.

    Living Inside: Little House, Big Moods

    Here’s the thing. The front kitchen in this Flagstaff makes sense. I’ve got real counter space for once. I set a small pour-over coffee rig by the window and watched elk slide past the tree line at sunrise. That felt like a win.

    • Bed: true queen, slides out smooth; no foot squeeze
    • Sofa: comfy for two, stiff for three. Beans claimed the corner. We’re still debating swapping it for true recliners—after living with several styles on other rigs, here’s what I’ve learned about RV recliners, the good and the bad.
    • Bathroom: radius shower; I fit fine at 5'7". Taller folks might bump a shoulder.

    Storage was sneaky good. Under-bed bins swallowed blankets and a pack-and-play. The pantry held a week of food if I stacked cans like Tetris. The 12V fridge got cold fast, even when we boondocked off FR525 near Sedona. That road’s washboard, by the way—bring patience and go slow.

    The Outside Bits That Matter

    The side griddle got used daily. Pancakes in the morning, fajitas at night. Grease cleanup wasn’t awful—keep a roll of shop towels handy. The awning arms feel sturdy; I still pull it in if gusts kick up. Learned that the hard way with my old trailer.

    Solar came wired from the factory roof panel. On a sunny day, we kept phones, lights, and the MaxxAir fan going without touching the generator. Cloudy weekend? We rationed.

    When one of those cloudy afternoons trapped us inside the rig near Sedona, we discovered a surprisingly fun way to pass the time—an online version of keno that lets you play with chat-room tokens right from your phone. If the idea of a quick, low-stakes game sounds like a good rainy-day distraction, Token Keno on InstantChat offers a clear rundown of the rules, payout tables, and smart wagering tips so you can keep it entertaining without burning through your data or your budget.

    I did add a small Jackery for laptop charging. Not fancy, just practical.

    What Broke (and How I Fixed It)

    I won’t sugarcoat it. This is RV life. Stuff wiggles loose.

    • Shower door seeped at the bottom on trip two. A thin bead of clear silicone solved it. Five minutes, no drama.
    • One kitchen drawer slide backed out. Two screws and blue Loctite—done.
    • The radio antenna… meh. Static. I put a little stubby antenna on, and it’s better but still not great in the pines.
    • Water pump was louder than I liked. A short section of PEX had a hard bend. I added a small flex line and some foam under the lines. Much quieter.
    • Slide squeaked once after driving through dust near Cottonwood. A careful cleaning and a dry lube on the seals calmed it. (Don’t grease the tracks; just clean.)

    Warranty? Forest River covered a loose entry door latch. My dealer in Mesa actually fixed it the same day. Small miracle.

    How It Feels Over Time

    After six long trips and a bunch of quick weekends, the Flagstaff still feels tight. No soft floors. The roof sealant looks good; I check it every couple months and keep a tube of Dicor in the front pass-through. The finish on the cabinets holds up to sticky kid hands and dog nails. That’s saying something.

    Heat and A/C both do their job. In Flagstaff nights at 38°F, the furnace cycled but never woke the kid. In Havasu heat, the ducted A/C kept us at 75°F if I pulled the shades and cooked outside. If you like it chilly, a soft-start on the A/C helps a lot with small generators.

    Little Joys That Surprised Me

    • The big front window for the kitchen sink. Morning light is friendly, even before coffee.
    • Magnetic baggage door catches—no more head bumps.
    • The MaxxAir fan actually pulls a breeze. Cracked a back window and the trailer aired out fast after a rain.

    Things I Wish Were Different

    • The mattress was fine for a few trips, then “meh.” We added a 3-inch topper. Now it’s a nap trap.
    • The stock shower head felt stingy. I swapped it for an Oxygenics and saved water while it felt better.
    • Fresh tank sensor reads 1/3 when it’s closer to empty. I don’t trust sensors. I trust my fill times and my ears.

    Real Camps, Real Notes

    • Fort Tuthill County Park, Flagstaff: Shady, easy pull-throughs. Watch for tree limbs when you park; the awning cleared with inches to spare.
    • Dead Horse Ranch State Park, Cottonwood: Great trails. Hookups were clean, and water pressure was strong. I kept the pressure regulator on—always.
    • FR525 near Sedona: Dusty, pretty, and popular. I used my LevelMatePRO app to get level on that weird slope by the junipers. Worth it for the sunset.

    If you ever find yourself rolling farther east, pencil in a stay at Riverhouse Acres beside North Carolina’s Pigeon River—it’s the kind of peaceful riverside park that shows off exactly why we haul these rigs around.

    While you’re dreaming up future routes, imagine steering the rig north along the Mississippi River into Wisconsin. A night or two in historic La Crosse can be a fun detour, especially if you’re curious about what the city’s grown-up nightlife has to offer beyond the campfire. The La Crosse USA sex guide delivers up-to-date intel on bars, clubs, and adult-friendly venues, helping travelers quickly zero in on safe, reputable spots for evening entertainment without wasting precious road-trip time on trial and error.

    Quick Pros and Cons

    Pros

    • Smooth tow and steady in crosswinds with the right hitch
    • Front kitchen layout feels roomy and useful
    • Solid storage and nice fit/finish for the price
    • Factory solar helps on simple boondock weekends
    • Outdoor griddle is a crowd pleaser

    Cons

    • A
  • My Honest Take on Rent-to-Own RVs: What Worked, What Hurt, and What I’d Do Again

    I’m Kayla, and yes, I actually did a rent-to-own on an RV. We used it. We camped in it. We fixed it. We even fought with a water pump in the dark outside Moab. So I’ve got thoughts.

    You know what? I didn’t plan to do rent-to-own. We rented a couple rigs first, loved the whole campfire life, and then wanted our own without a big loan right away. Rent-to-own felt like a bridge. It was, kind of.

    So… why rent-to-own anyway?

    We’re a family of four, plus one loud dog, Daisy. We wanted memories now. Not “one day.” But buying new felt scary. Prices were high. Rates were weird. A used RV was more our speed, but we still wanted a test phase.

    Rent-to-own gave us time. We had full use. We could walk away if it didn’t fit. That part mattered.

    Our exact deal (numbers you can feel)

    We did our deal with a small used dealer near Kansas City, KS. Not a big chain. The rig: a 2019 Forest River Rockwood Mini Lite 2509S with bunks. Light enough for our half-ton truck. One slide-out. Murphy bed. No glam, but cozy.
    If you want to dig into real-world feedback on that model, here’s a collection of Forest River Rockwood Mini Lite owner reviews that helped us sanity-check the floorplan before we signed.

    • Term: 24 months
    • Monthly payment: $1,150
    • Monthly credit toward purchase: $350
    • Up-front deposit: $3,000 (refundable minus damage)
    • Buyout price at end: $19,500
    • Insurance: on us (about $78/month through Progressive)
    • Storage: also on us ($110/month when not in use)
    • Maintenance: on us (yep… that one was… spicy)
    • Mileage: unlimited miles, but generator hours had a limit (we barely used it)

    Sales tax was due when we bought it at the end, not during the “rent” phase. The dealer handled title after buyout. That part went smooth.

    Did we buy it in the end? We did. We finished the 24 months and then paid the buyout. No drama there.

    Test runs that helped us choose

    Before the rent-to-own, we did two real trips with rentals:

    • A 2017 Winnebago Micro Minnie 2106DS for a long weekend, booked through Outdoorsy. Loved the Murphy bed. Hated the tiny bath.
    • A 2016 Keystone Passport 2400BH for a week near Broken Bow. Great bunks for the kids. The sway in wind… not great. Learned we needed better weight distribution.

    Those trips told us what we can tow, what we can’t, and what we’ll actually use. Bunks? Yes. Outdoor kitchen? Fun but not a need. Big fridge? Yes, yes, yes.

    The good stuff

    • We had keys right away. No waiting for loan approvals or endless paperwork.
    • We camped a lot. Smoky Mountains in fall. Padre Island in spring. Moab in the heat, which I don’t recommend, but the photos? Wow. That desert haul felt a lot like when I took a Flagstaff rig across Arizona—beautiful, but with quirks you don't notice until the pavement sizzles.
    • If you’re seeking a laid-back campground near those Smoky Mountain trails, Riverhouse Acres gave us river views and hot showers that felt downright luxurious after a muddy hike.
    • We used the two years to learn repairs. I can now winterize without crying. Most days.
    • We were not locked to buy. If it became a money pit, we could leave and just lose the deposit or repairs. It gave me peace.

    The not-so-good stuff (this is where the sweat lives)

    • Repairs were on us. Even during the “rent” phase. Our water pump died outside Moab. We swapped it in a dusty campground, headlamp on, kids chasing the dog, me muttering. Pump: about $95. Time: two hours. Marriage: tested, survived.
    • One tire blew on I-35 near Waco. Tire and roadside: about $280. Lesson: always check tire dates, not just tread.
    • Hidden fees can sneak. We dodged them by reading the whole contract out loud at the dealer’s desk. Awkward? Yes. Worth it? Also yes.
    • The monthly credit was small. You pay a lot to “rent.” Only a slice goes to the final price.

    What it actually cost us per month

    Here’s our average when we weren’t traveling heavy:

    • Payment: $1,150
    • Insurance: $78
    • Storage: $110
    • Propane, small stuff: about $25
    • Maintenance, averaged out: about $40

    So around $1,403 a month to have it. Only $350 of that cut down the buyout price. The rest was the cost of using it now.

    Is that smart money? Depends. If you camp twice a month and your kids live for it, it feels worth it. If you go twice a year, that’s a hard pill.

    Real-life trip moments (the sweet and the salty)

    • The night in the Smokies when the fog rolled over the ridge. The kids fell asleep to tree frogs. The slide-out squeaked once, then hush. Pure magic.
    • That time I forgot to latch the fridge before we left the site. I opened the door at a gas stop and took a yogurt shower. I still laugh. Sort of.
    • Winterizing in November. My hands went numb. But I nailed it. No cracked lines that year. Small win, big mood.

    While most evenings were just us and the crickets, we discovered that campgrounds can double as social hubs for grown-ups on the road. If you ever pull in hoping the neighbors might become more than a quick hello, an adults-only community like WellHello can match traveling singles and adventurous couples with nearby members in minutes, giving you a discreet way to line up fireside drinks—or a little after-dark fun—without the awkward small talk.

    If your route ever swings through Arizona and you’re curious about where the nightlife heats up once the campfire dies down, the up-to-date Scottsdale USA sex guide details the best clubs, bars, and couples-friendly spots in town so you can decide whether to hitch up the trailer or grab a rideshare before diving into the scene.

    Who should try rent-to-own?

    • You want the RV life now, and buying this minute feels risky.
    • You have a tow vehicle that can handle it. Know your tow rating and the RV’s GVWR.
    • You’re okay doing repairs or learning fast.
    • You plan to camp often, not just once in a while.

    Who should skip it?

    • You hate surprise costs.
    • You don’t want to read contracts.
    • You can buy a solid used trailer with cash instead. That’s cleaner.

    Quick tips that saved us a headache (or ten)

    • Get a pre-inspection. Pay a mobile RV tech to check roof seals, slide motors, soft floors, and the black tank valve.
    • Ask for the APR equivalent. They’ll say it isn’t a loan. Still ask what your effective rate would be if it were.
    • Cap fees in writing. Cleaning, generator hours, late returns, and mileage rules should be clear.
    • Check tire dates. Replace if older than six years.
    • Test everything before signing. Slides, AC, furnace, water pump, water heater on both propane and electric, all lights, outlets, and the awning.
    • Insurance: call your provider first. Some want special wording for a rent-to-own.
    • Winter rules. Who winterizes? Who pays if a line freezes? Get it in writing.
    • Title and taxes. Ask how and when the title transfers and when tax is due.
    • Buyout math. Know the exact buyout price each month of the term. Not just at the end.

    Models that worked well for us to tow and live in

    • Forest River Rockwood Mini Lite 2509S (our pick): light, bunks, Murphy bed, decent storage.
    • Jayco Jay Flight SLX 264BH: simple and tough. Great for kids.
    • Grand Design Imagine XLS 22RBE: comfy for couples, roomy bath, nice build.
    • Coachmen Freedom Express 248RBS: great floor plan; roomy kitchen for camping food that isn’t just hot dogs.

    For specs, weights, and current floorplans, you can skim RVing Planet’s full Rockwood Mini Lite guide while you shop.

    One upgrade we splurged on later was swapping the factory jackknife sofa for true recliners; on road days, [my RV recliners got a thorough test](https://

  • I Replaced My RV Water Tank. Here’s What Actually Happened.

    I thought my old fresh tank would last forever. It didn’t. A hairline crack showed up right by the outlet on a hot day in June, and I learned fast how fast 20 gallons can vanish onto a gravel pad. You could hear the pump sigh like it was tired of my nonsense. Same, buddy.

    If you’d like the blow-by-blow of the parts I bought, the mistakes I made, and the photos I’m a little embarrassed to publish, you can skim the separate recap of the whole replacement process over at this tank-swap diary.

    So I swapped it for a Class A Customs 42-gallon fresh water tank. (You can check out the exact model on the Class A Customs product page.) I’ve used it for five months now. Three trips. One dusty boondock weekend. Two rainy campground stays. Here’s the good, the bad, and the “well, that was dumb, Kayla.”

    The Setup I Started With

    • Trailer: 26-foot travel trailer, no slide, pretty light.
    • Pump: Shurflo 4008 (the common one).
    • Lines: 1/2-inch PEX with SharkBite fittings.
    • Fill: Side-fill port with a Camco drinking-water hose.
    • Monitor: Swapped to a SeeLevel strip later because the stick-on sensor lied like a toddler.

    Want a real-world place to put any fresh-water system through its paces? River House Acres offers riverside sites with clean fill stations and enough elbow room to tinker without the campground rush.

    The tank I bought came with a 1.25-inch fill port, a 3/8-inch vent, and 1/2-inch NPT outlet and extra ports. It’s rotomolded plastic. Light but tough. The kind you can knock with your knuckle and hear a solid thud.

    Was It Easy To Install? Yes… and No

    I’ll be honest. The first hour felt easy. Then I met the vent line.

    • I slid a rubber stall mat under the tank to cut vibration.
    • I built two simple plywood rails so the belly straps wouldn’t bite into the plastic.
    • I wrapped the fittings with Teflon tape, then added a touch of thread sealant. Belt and suspenders.
    • I raised the vent hose so it didn’t kink. This fixed “burping” while filling.

    Filling was slow at first. I thought the tank was junk. It wasn’t. My vent line drooped, and it choked the air. One zip tie later, the tank took a full fill with a steady glug. You know what? Sometimes it’s me, not the gear.

    First Trip: Dry Camping Near Moab

    We rolled out dusty and happy. I filled the tank at a city spigot—clear potable water, tested and posted. I mixed 1/2 cup of plain bleach for my first sanitize (about 30 gallons in the tank), let it sit for four hours, then flushed twice. No plastic taste after that. My kids noticed, and they’re picky about water.

    The fridge, by the way, was a saga all its own; the wins, woes, and inevitable “oops” moments are captured in my cold-milk survival story right here: RV fridge tale.

    Running the sink and the outdoor sprayer felt normal. The pump tone stayed smooth. No shudder. No hunt. I checked under the trailer each morning. Dry as a bone.

    Only snag? Weight. A full 42 gallons is heavy. I could feel the trailer settle. Towed fine with our setup, but I now travel with 1/3 tank unless we’re headed off-grid. (When I dragged a Flagstaff rig clear across Arizona, I learned a few extra tricks about managing tongue weight and desert heat—those notes live in this southwest road test.)

    Rainy Weekend Test: Hookups, Hot Showers, No Drama

    At a state park, I used city water most of the time. I still ran the pump on day two to keep water moving through the tank. Good habit. The tank didn’t sweat too much, but I did get a little condensation patch in humid Alabama. Nothing wild. The rubber mat helped.

    We did two showers and a pile of dishes after a muddy hike. The tank didn’t bow in a scary way, but I could see a gentle belly between the straps when full. Normal for this style, but I added a third strap later. Cheap fix, better sleep.

    Side note for adults who treat rainy campsite evenings as “screen-time after the kids crash:” a reliable, vet­ted directory for mature entertainment saves bandwidth and awkward pop-ups. Check out this list of the best sex sites for a quick, well-organized breakdown of reputable platforms, privacy features, and membership costs, so you can decide what’s worth your limited campground Wi-Fi without trial-and-error.

    If your route ever swings you north of the border and you’re curious about Vancouver’s after-dark scene, a traveler-friendly resource exists in the form of the USA Sex Guide: Vancouver edition that details local etiquette, neighborhood hotspots, and up-to-date safety tips so you can explore confidently without wasting a minute of precious road-trip downtime.

    Small Things I Liked

    • The plastic didn’t hold smell after a proper sanitize. That’s huge.
    • The 1/2-inch outlet lined up with my PEX run. No weird adapters needed.
    • The port threads were clean; the fittings bit well with tape.
    • It sat flat on the rails without rocking.

    Things That Bugged Me

    • The vent port is small, so slow fills if your vent line sags. Keep it high and straight.
    • No built-in mounting tabs. Straps only. I made my own blocking, which is fine, but still a note.
    • The stick-on sensor read 1/3 when the tank was half full. I swapped to a SeeLevel strip and moved on.
    • In heat, the tank swells a bit when topped off. It’s normal, but plan for it. Give it space.

    Taste, Flow, And Day-To-Day Use

    Taste is clean after a bleach flush. I use a Camco charcoal filter at the spigot and a basic inline strainer before the pump. Flow at the faucet stayed steady. The pump cycles less now that the outlet is straight, not bent like my old cracked tank line.

    One odd thing: if I open the sink full blast while someone kills the outdoor sprayer, the pump thumps once. Just a single thud. It doesn’t worry me, but I noticed.

    Cleaning And Care (What I Actually Do)

    • Sanitize at the start of each season: 1/4 cup bleach per 15 gallons, let sit, then flush.
    • Keep the vent high to stop burps while filling.
    • Travel with 1/3 tank unless boondocking. Save weight, save brakes.
    • Winterize with air through the lines; I don’t fill the fresh tank with pink stuff. I just drain it bone dry and leave the cap cracked for a day.
    • Every month in summer, I run a little baking soda mix through the lines and flush. It helps with any hint of funk.

    A Quick “Wish I Knew” Moment

    I thought more water was always better. It isn’t if your trailer is already near its limit. Check your payload. Forty-two gallons is around 350 pounds. Plan your gear around that, or start tossing firewood back out like I did in a windy rest area. Not my finest hour.

    Pros And Cons, Plain And Simple

    Pros

    • Clean taste after a single sanitize
    • Easy plumbing with common 1/2-inch fittings
    • No leaks so far, even on washboard roads
    • Price felt fair for the size and build

    (If you’d rather grab the tank bundled with a pump and fittings, it’s also available as a kit on Ubuy.)

    Cons

    • Slow fill if the vent line isn’t perfect
    • Needs straps and blocking; no tabs
    • Basic sensors read funky without an upgrade
    • Slight swell when totally full

    Would I Buy It Again?

    Yes. For a budget-friendly, sturdy fresh tank, this one delivers. It kept us showered, cooking, and sane across three trips. If you want more water, go bigger. If you want less weight, the 30-gallon version is solid too. I might do that next time, just to save a few pounds and some towing nerves.

    Here’s the thing: water is

  • RV Stabilizer Jacks: What Actually Stopped the Shake in My Camper

    I’m Kayla. I camp with my husband, two kids, and our loud but sweet lab mix, Millie. Our trailer is a 2019 Grand Design Imagine 2400BH. It’s not huge, but when the kids jump, the whole rig can shimmy like a wobbly table. Coffee? Spills. Dishes? Rattle. My nerves? Yeah… a bit fried. Before I dove in, I read about how another camper completely stopped the shake using different RV stabilizer jacks—that article became my blueprint.

    So I tested stabilizer jacks. A few kinds. In the wind, with kids, on gravel, and one very bouncy campsite pad in Oklahoma. Here’s what really helped, what sort of helped, and what just took up space in my bin.

    (To get a deeper look at my specific rig, you can skim the full Grand Design Imagine 2400BH Specifications for all the weights, lengths, and tank sizes that factor into how it reacts to movement.)


    My Setup, So You Know Where I’m Coming From

    • Trailer: 2019 Grand Design Imagine 2400BH (tandem axle)
    • Stock gear: Manual scissor jacks on all four corners
    • Tools I use: 3/4-inch socket on a cordless drill, little wood blocks, rubber pads

    I learned fast: stabilizer jacks are for steadiness, not for lifting the RV. Level first. Then chock. Then set the stabilizers. Otherwise, you chase your tail.


    The Stuff I Used (And Used Again)

    1) Stock Manual Scissor Jacks

    These came on my trailer. I drop them with a drill. On a calm night, they’re fine. But when the wind hits, or a kid rolls over in the bunk, the trailer still sways. Not crazy, just enough to feel it. Like standing on a dock.

    What helped them:

    • Camco jack pads under each foot (less sinking into soft ground)
    • A small wood block (saves time and keeps the jacks from over-extending)
    • A tiny dab of grease on the screws (quiet and smooth)

    Pros: simple, cheap to keep.
    Cons: don’t kill the wiggle on their own.


    2) BAL X-Chock Wheel Stabilizers

    These go between the tires on a tandem axle. I bought two, one for each side. First use was in Palo Duro Canyon during a windy spring storm. Before X-Chocks, the trailer rocked front-to-back when someone moved. After? The fore-aft shimmy dropped a lot. Not perfect, but better.

    Real moment: my son climbed the bunk ladder, and the cereal bowls didn’t clack. That was new. That same feeling of solid footing reminded me of a road-trip review I read when someone took a Flagstaff RV across Arizona and noted how critical good stabilization was on desert gusts.

    Pros: big cut to front-to-back movement; fast to set.
    Cons: you still feel side-to-side sway if that’s your main issue.


    3) JT Strong Arm Stabilizers (Lippert)

    I installed these myself. They’re metal bars that tie the frame to the jacks, kind of like firm arms that cross-brace the legs. There are little T-handles you tighten after you drop the jacks. It took me an afternoon, a socket set, and a few breaks for snacks.

    After install, my trailer felt… planted. Not stiff like a house, but firm. I could make a sandwich without the counter bouncing. The kids could flop on the bunks, and my coffee stayed in the mug. You know what? That felt like a small win. (If you’re curious about the exact kit I used, the JT Strong Arm Jack Stabilizer Kit page shows the components and install diagrams that convinced me to try it.)

    Field test: windy night at Lake Thunderbird, OK. With X-Chocks plus JT Strong Arms, I could type on my laptop without the screen wobbling. That’s the test I didn’t know I needed.

    Pros: best improvement to overall steadiness; side-to-side and front-to-back.
    Cons: costs more; you do need to install it and remember the T-handles.


    4) Valterra Aluminum Stack Jacks

    I borrowed these from my neighbor first, then bought a set. They’re little stands you slide under spots that still bounce—like under the steps or near the kitchen area. I use one under the steps when the ground is soft. Way less “thunk” when someone comes in.

    Pros: cheap, light, nice add-on under flexy spots.
    Cons: they’re not a full fix by themselves; just support.


    5) Camco Eaz-Lift Scissor Jacks (Portable Pair)

    I bent one of my rear stock jacks on a nasty dip near Broken Bow (ugh). While I waited on parts, I ran a portable pair from Camco. They worked like the stock jacks, and I still keep one as a “floater” under the rear frame when I park on a weird pad.

    Pros: tough, simple backup.
    Cons: more gear to haul; not magic by themselves.


    6) Lippert PSX1 Electric Stabilizers (Used on My Sister-in-Law’s Trailer)

    I used these on a weekend with my sister-in-law’s 2020 Keystone Passport. Button press, down they go. Super easy. But ease and rock control are two different things. With no extra bracing, I still felt some sway. When we added my spare X-Chocks? Much better.

    Pros: convenience.
    Cons: still needs help from X-Chocks or a bracing system if you hate wobble.


    Real-World Moments That Sold Me

    • The windy night test: Before upgrades, my wine glass buzzed on the table when gusts hit. After X-Chocks + JT Strong Arms, the glass sat quiet. I kept checking it like a weirdo.
    • The bunk flop: My kids love to “fall” into bed. Pre-upgrades, the whole trailer answered back. Post-upgrades, I just heard a thud and a giggle. No trailer sway chorus.
    • The step thunk: With a stack jack under the steps, my morning walk-out didn’t shake the hallway. Millie still shook her ears, though. Loud dog.

    If you’re ever rolling through North Carolina and want a riverside campsite that lets you feel the difference a solid stabilizing setup can make, spend a night at Riverhouse Acres—their level pads and flowing Tuckasegee backdrop will put your gear to the test.


    What I’d Do If I Were You (Based on My Hands-On Mess)

    • Start with your base: keep the scissor jacks greased, use pads, and add small wood blocks.
    • If you have a tandem axle, add BAL X-Chocks. They make a real, clear difference.
    • If side-to-side sway bugs you most, add JT Strong Arms. That’s what made my trailer feel steady, not just “less wiggly.”
    • Use a stack jack under the steps or soft spots. It’s a cheap, happy fix.

    Shopping tip: Solid stabilization gear doesn’t have to drain the camping fund. I’ve had good luck combing community classifieds for gently used equipment—one nationwide hub worth a quick search is the Backpage local listings. Because it’s organized by city and category, you can often score X-Chocks, stack jacks, or even full stabilizer kits at garage-sale prices before you ever hit the checkout button on a retail site.

    Another travel tip: if your route ever takes you through Groveland, California—maybe you’re staging outside Yosemite and craving an adults-only evening after a dusty day on the trails—peek at the USA Sex Guide Groveland for a concise rundown of lounges, dancer bars, and low-key date spots so you can skip the guesswork and head straight to the kind of nightlife that fits your vibe.


    Quick Tips I Learned the Hard Way

    • Level first, then chock, then stabilizers. That order matters.
    • Don’t over-crank the stabilizers. Firm, not lift.
    • Shorten the jack travel with blocks. Less bounce.
    • Re-check after the first night. Things settle.
    • Wind exposes weak spots. Tighten those T-handles on the brace bars again if needed.

    And should your stabilizers reveal a hidden leak in the underbelly (it happens), don’t panic—I replaced my RV water tank, here’s what actually happened walks you through the fix with fewer surprises.


    Pros and Cons, Fast and Plain

    • X-Chocks

      • Pros: cuts front-to-back motion a lot
      • Cons: doesn’t fix side-to-side by itself
    • JT Strong Arm

      • Pros:
  • My RV Septic Tank Story: What Worked, What Stunk, and What I’d Buy Again

    I camp a lot. Two kids, one dog, and a 32-foot trailer. So yeah, I live with an RV septic tank. And you know what? I don’t hate it. Not every day, anyway.

    For the full backstory—including extra details on what gear impressed me, what flat-out stunk, and which products I’d still plunk money down for—check out my RV septic tank story.

    Here’s the thing. Folks call it a “septic tank,” but in an RV it’s the black tank (toilet) and the gray tank (sinks and shower). I use both, and I also use a portable waste tank when a site doesn’t have sewer. I’ve had a few oops moments. I’ve also found a rhythm that keeps the smell down and the mess low.

    Let me explain.

    What I Bought and Why

    I use:

    • Camco Rhino 28-Gallon Portable Waste Tank (the low, gray one with big wheels)
    • RhinoFLEX 15-foot sewer hose with a clear 90-degree elbow
    • Happy Campers tank treatment (powder)
    • Valterra Flush King backflush kit
    • A cheap garden hose marked “poo only” with tape

    If you want to see the exact tote I’m talking about—complete with those heavy-duty, no-flat wheels and the built-in gate valve—take a look at the Camco Rhino 28-Gallon Portable Waste Tank I rely on.

    Why this setup? My trailer’s black tank is 38 gallons. The 28-gallon tote is heavy when full, but I can still move it. I tried a 36-gallon tote once. Never again. It pulled my shoulder and scraped on speed bumps. I learned fast.

    Swapping out the fresh-water side of the system gave me even more plumbing perspective—here’s what actually happened when I replaced my RV water tank—and a few of those lessons carried over to my black-tank routine.

    First Time Out: The State Park Test

    We camped at Keystone State Park in June. No sewer at the site. Day three, the toilet started to “gurgle.” Not scary, just a hint. Time to dump.

    Some of the habits I leaned on here I’d already drilled during a long desert haul—my Flagstaff RV trip across Arizona—so the workflow felt familiar.

    I filled the black tank to about two-thirds with water first. This matters. A dry dump can clog. Then I hooked the RhinoFLEX hose from the trailer to the portable tank. I opened the vent on the tote (tiny cap on the top). The clear elbow showed a brown stream (gross but helpful). It took about 8 minutes.

    I capped the tote, hooked the metal handle to my hitch ball, and drove slow—walking speed—to the dump station. No smells in the truck. The big wheels rolled fine on gravel. That part feels weird the first time. You’re towing… well, poop. But it’s okay.

    I dumped the tote with the gate valve, rinsed it with the Flush King and the garden hose. Clear water came out. Done. Then I pulled the gray tank to rinse the sewer hose. That little trick keeps the stink way down.

    If you ever want a full-hookup spot where the dump station is a quick stroll from your site, check out Riverhouse Acres before your next trip.

    What I Liked

    • It didn’t leak. Not even a drip. The gate valve on the Rhino is solid.
    • The clear elbow saved me. I could see when it ran clear while rinsing.
    • It tows slow and steady. Those no-flat wheels matter on rough pads.
    • The size is right. Heavy, yes, but I can manage it without help.
    • Easy to clean. I run water through until it’s clear and let it air dry.

    For a deeper dive into what makes this tote tick (and a few quirks I haven’t bumped into yet), check out this comprehensive review of the Camco Rhino Portable Waste Tank.

    What Bugged Me

    • Full means heavy. I’m 5'5". I can move it, but I can’t lift it into a truck bed by myself. I roll it.
    • The caps cross-thread if I rush. I have to slow down and line it up.
    • It needs space in the pass-through. It’s not tiny.
    • If you forget the vent? It burps and splashes. I did that once. Only once.

    A Mess I Made (So You Don’t)

    At Lake Murray, I didn’t snap the bayonet fitting all the way. I saw a slow drip on my shoe. Not a flood, but still gross. Paper towels and bleach wipes saved me. Now I tug the fitting twice to double-check. I also put a puppy pad under the connection when I’m unsure. Cheap insurance.

    Does It Smell?

    Only when I get lazy. Here’s my routine that keeps things fresh:

    • I add one scoop of Happy Campers after each dump.
    • I always keep 2–3 gallons of water in the black tank. Never leave it bone dry.
    • I dump at two-thirds full, not half. More water means better flow.
    • I rinse with the Valterra Flush King till the clear elbow runs, well, clear.
    • After a trip, I let both hoses dry in the sun. UV helps.

    If I stick to this, we’re fine. No rotten egg smell. If I don’t? We all pay.

    Winter and Cold Nights

    When temps drop, I add a splash of RV antifreeze to the tote after cleaning. I store it upright. I also run a bit through the hose so it doesn’t freeze at the ends. Simple, but it keeps the caps from sticking.

    Little Tips That Saved My Back

    • Don’t fill the tote to the brim. Stop at “heavy but safe.”
    • Use rubber wheel chocks so the tote doesn’t roll while you attach the hose.
    • Wear nitrile gloves, then a thin work glove on top. Grip and protection.
    • Keep a “dirty bin” for sewer gear. Nothing else goes in there.
    • If the dump station line is long, go early morning. Fast and calm.

    While most of my trip planning centers on dump stations and family-friendly hikes, the grown-ups in our rig occasionally look for a little off-site fun once the tanks are drained and the kids are zonked. If your road swings through Dublin and you’re curious about the local after-dark vibe, the candid rundown at One Night Affair’s USA Sex Guide – Dublin lays out venues, etiquette tips, and safety pointers so you can explore confidently and keep the adventure going long after sunset.

    One Odd Thing I Love

    The sound. When the tank flush works, you hear a smooth whoosh—no “glugs.” If you hear glugs, open the vent or check for a kink. It’s funny how your ear learns this. Mine did.

    Who This Setup Fits

    • Weekend campers at sites with no sewer.
    • Folks who hate moving the whole rig just to dump.
    • People who want a tough tote with simple parts and no gizmos.

    Even A-listers coasting down the highway in million-dollar tour buses have to deal with black tanks and dump stations sooner or later; if you’d like a peek at how the rich and famous handle life on the road—and maybe score a few luxe travel ideas while you’re at it—swing by the rundown of star-studded RVing at JustBang’s celebrity travel blog where you can browse insider stories and tips straight from the spotlight.

    If you full-time and move weekly, you might go bigger or use a macerator pump. I tried a Flojet pump with a hose to the tote once. It worked, but it was slow and fussy for me. I went back to gravity and the Rhino.

    Final Take

    I thought I’d hate towing a waste tank. Turns out, I only sometimes hate it. Most days, it’s fine. The Camco Rhino 28-Gallon tote has held up to a year of trips, about 20 dumps, and a few hot Texas afternoons. No cracks. No wild leaks. Just do your rinse, keep some water in the black tank, and don’t rush the caps.

    Would I buy it again? Yep. I already did for my sister’s camper. And I gave her the same pep talk: slow hands, open the vent, clear elbow, then gray water to rinse. Simple rhythm, much less drama.

  • My RV Hot Water Heater Story: What Kept Us Clean, Cozy, and Not Cranky

    I’m picky about hot water. I camp with two kids, one golden retriever, and a husband who takes long showers. So yeah, the water heater matters. I’ve lived with two kinds in our rigs: a small tank model from Suburban and a tankless unit from Girard. Both worked. Both made me swear a little. Here’s what happened, plain and simple.

    If you’d rather jump straight to the extended play-by-play of the whole ordeal, I laid it all out in this detailed hot water heater post.

    Rig One: Suburban 6-Gallon Tank (R-Pod era)

    Our 2017 R-Pod came with a Suburban 6-gallon gas/electric heater (SW6DE). Gas side was 12,000 BTU. Electric side pulled about 12 amps on shore power. It did the job, until it didn’t.

    For authoritative information on the Suburban SW6DE water heater, you can refer to the product page on Amazon.

    Real morning, real place: Burlington Bay Campground on Lake Superior. Wind off the lake. I turned on the shower and got nice hot water fast. Steam fogged the little mirror. I hummed. Then my husband jumped in after me. Warm. Then the kids tried. Lukewarm turned to “ICE! MOM!” in about three minutes flat. The recovery on gas was decent, but it still took a bit to heat back up. Electric only? Slow. Like, slow-slow. I’d make coffee while it caught up.

    Winter chores were messy but simple. I pulled the anode rod with a 1-1/16" socket, drained the tank, and flushed the crud with a cheap plastic wand. If the water smelled like rotten eggs in spring, I ran a hydrogen peroxide flush. Ten minutes later, the smell was gone. It wasn’t fun, but it felt like brushing teeth—boring yet vital.

    What I liked

    • Fast hot water at the tap, no weird temp jumps
    • Electric mode saved propane on hookups
    • Parts are easy to find at most RV stores

    What made me grumpy

    • Hot water ran out fast with back-to-back showers
    • Electric-only recovery took a long time
    • Anode rod service is messy, and that smell sometimes showed up

    Rig Two: Girard Tankless (Micro Minnie era)

    We switched to a 2021 Micro Minnie and installed a Girard GSWH-2 tankless. It lights on propane and needs 12V power for the controls. The wall panel lets you set the temp (I left it at 110°F most days). When it fires, you hear a soft “whoosh,” which weirdly made me smile. Like, okay, we’re on.

    For detailed insights into the Girard GSWH-2 tankless water heater, consider visiting the manufacturer's official website.

    Scene: boondocking by Zion. Pump set to 45 psi. I turned the shower on and got steady hot water for as long as I wanted. No counting to 90. No sprint showers. The kids washed muddy knees forever. Dish duty got easier too—I didn’t have to plan around a tank.

    But here’s the thing. Low flow showers tripped it up. If I tried a tiny trickle to “save water,” the burner sometimes shut down. Then came the “cold sandwich”—hot, then a brief cold hit, then hot again. I learned to keep the flow steady, not drippy. Want short on/off bursts for Navy-style showers? Tankless systems can be fussy with that. I adjusted my habits: steady flow, quick soap, done.

    Winter care was lighter. I drained the unit, and I ran white vinegar through it once a year to clear scale. No anode rod party, thank you.

    What I liked

    • “Endless” hot water, as long as you have propane and flow
    • Steady temp when the faucet stays open
    • No waiting for a tank to recover after someone sings in the shower

    What made me grumpy

    • Needs a minimum flow, or it shuts off
    • Brief cold burst if you start/stop the water a lot
    • Uses more propane when everyone’s taking long showers

    Real Moments That Sold Me (or not)

    • Bryce Canyon, 37°F dawn: With the Suburban, shower one was great, shower two was “eh,” shower three was fast and loud. With the Girard, everyone showered hot. I even shaved without rushing.
    • KOA laundry night in Amarillo: I ran electric mode only on the Suburban to save propane. Dishes were fine. Showers? Not that night. It just took too long to reheat.
    • Zion mud day: Tankless plus kids equals clean kids and a big grin from me. I didn’t count minutes. I counted “sighs of relief.”
    • Riverside weekend: At the family-run Riverhouse Acres campground, the kids used the creek to rinse off while I savored unlimited in-rig hot water, proving the tankless shines even when great bathhouses are steps away.

    Setup Tips That Actually Helped

    • Suburban tank:
      • Use gas for showers and save electric for dishes.
      • Replace the anode rod each year if it’s chewed up. It’s cheap insurance.
      • If you smell sulfur, flush with peroxide. Don’t ignore it.

    When the day finally came to replace our entire fresh water tank, I documented every wrench turn in the step-by-step breakdown here.

    • Girard tankless:
      • Keep the shower at a steady flow. Not too low.
      • Set the temp on the wall panel lower (around 108–112°F) and don’t mix a ton of cold at the faucet.
      • Descale with vinegar once a season if your water is hard.

    Power and Propane, Plain Talk

    • Suburban electric pulls about 12 amps at 120V. It’s fine on 30-amp hookups but slow to reheat.
    • Propane on the tank model sips when the water sits hot. It cycles now and then.
    • Tankless burns hard only while water flows. Long showers use more propane. Quick dish rinses use less.
    • The Girard used a small bit of 12V power while running. Our battery system handled it fine.

    Noise, Space, and Comfort

    • Suburban: more of a gentle burner sound outside. Inside, you barely notice.
    • Girard: a clean “whoosh” on start. It’s not loud, but you hear it. Kind of like a small jet starting up… in a good way.
    • Space: The tankless gave us a little extra storage wiggle in the water bay. Not much, but I noticed.

    While we’re on the subject of creature comforts, let’s get real: when the kids crash and the campsite quiets down, a steady supply of hot water isn’t the only ingredient that can keep a traveling couple feeling close. Adventurous RVers who’d like to meet like-minded adults on the road might check out XMatch for no-strings connections, detailed reviews, and community forums that help you find over-18 fun wherever your rig is parked. And if your travels swing you toward the shores of Lake Erie, the candid, traveler-written advice in the USA Sex Guide for Erie can point you to the most welcoming clubs, bars, and local adventures—saving you from guesswork and making sure your grown-up downtime is as satisfying as your hot shower time.

    Price and Install

    • Suburban tank replacement: ballpark $400–$600 for the unit.
    • Girard tankless: around $700–$900 plus install parts.
    • Install took us an afternoon with basic tools, sealant, and some patience. I labeled every line with painter’s tape. Saved me from a dumb mistake.

    And yes, I have equally strong opinions about the septic side of the house—here’s the good, the bad, and the downright stinky in my full septic tank story.

    So, Which One Would I Pick?

    • For families on hookups, who don’t mind short showers: the Suburban tank is simple and steady. Electric mode is a nice plus.
    • For folks who want long showers and do a lot of dry camping: the Girard tankless feels like a mini home shower. Just keep the flow steady.

    Me? I stuck with the Girard in our Micro Minnie. I like not babysitting a tank. I like washing kids without a timer. Does it get fussy with a trickle? Yep. But once you learn its quirks, it’s a sweet setup.

    You know what? Hot water sets the mood for the whole day. Cold shock before coffee turns me into a gremlin. Give me the steady “whoosh,” a normal flow, and I’m good. Even the dog gets a warm rinse after a muddy hike. He hates it. I don’t.